Friday 17 February 2023

Tame Valley Canal

 Tame Valley Canal

A handful of archive photos from the Tame Valley Canal


Aqueduct over the River Tame carrying the Birmingham and Fazeley at Salford Junction - BCNS Archive

The above photos have been assembled from various sources, including those freely found on the internet. My thanks go to the many photographers alive and dead who have contributed to this collection and in so doing, are keeping the memory of these lost canals alive. These images are reproduced for ease of research are are not necessarily the property of this blog, and as such should not be used for commercial gain without the explicit permission of the owner (whoever that may be).

Wednesday 15 February 2023

Birmingham and Fazeley Canal

Birmingham and Fazeley

Salford to Fazeley 

This page is to contain interesting images of the Birmingham and Fazeley between Salford Junction and Fazeley Junction.

Coal Boat being strapped onto the Birmingham and Fazeley, probably carrying coal from the Amerton / Pooley area.

The above photos have been assembled from various sources, including those freely found on the internet. My thanks go to the many photographers alive and dead who have contributed to this collection and in so doing, are keeping the memory of these lost canals alive. These images are reproduced for ease of research are are not necessarily the property of this blog, and as such should not be used for commercial gain without the explicit permission of the owner (whoever that may be).

New Main Line Smethwick to Tipton

 New Main Line Smethwick to Tipton

This is a holding page to capture images of Telford's New Main Line from Smethwick Junction to Tipton. A Historical overview will be added later.


New Main line at Smethwick with Lattice Bridge 


The above photos have been assembled from various sources, including those freely found on the internet. My thanks go to the many photographers alive and dead who have contributed to this collection and in so doing, are keeping the memory of these lost canals alive. These images are reproduced for ease of research are are not necessarily the property of this blog, and as such should not be used for commercial gain without the explicit permission of the owner (whoever that may be).

Netherton Tunnel and Branch

 Netherton Tunnel and Branch

This is holding post for photos of the Netherton Tunnel and its connecting branch Canal. I will add a historical commentary at a later date.

BCNS Archive


The above photos have been assembled from various sources, including those freely found on the internet. My thanks go to the many photographers alive and dead who have contributed to this collection and in so doing, are keeping the memory of these lost canals alive. These images are reproduced for ease of research are are not necessarily the property of this blog, and as such should not be used for commercial gain without the explicit permission of the owner (whoever that may be).

Tuesday 14 February 2023

New Main Line

 New Main Line in Smethwick Area


The Art Deco Spon Lane Bridge

Tay or Pearl at Spon Lane - BCN Archive

Towards Bromford Junction from Bromford Road Bridge with Lattice Bridge in distance - BCNS Archive

The above photos have been assembled from various sources, including those freely found on the internet. My thanks go to the many photographers alive and dead who have contributed to this collection and in so doing, are keeping the memory of these lost canals alive. These images are reproduced for ease of research are are not necessarily the property of this blog, and as such should not be used for commercial gain without the explicit permission of the owner (whoever that may be).

Brades and The Gower Branch

Brades and The Gower Branch

The Brades is one of five connection between Brindley's Old Mainline and Telfords New Mainline, but has the distinction of having the sole surviving staircase pair of locks on the BCN (there were two others to my knowledge but both were privately owned and have been lost.

Claytons tar Tanker Frome rising into Brades Top Lock - BCNS Archive


Brades Locks - BCNS Archive

The following three images were probably taken at Brades and show how a single handed boatman could move two narrowboats as a single entity, with the butty in front:


Photographer unknown -  BCNS Archive

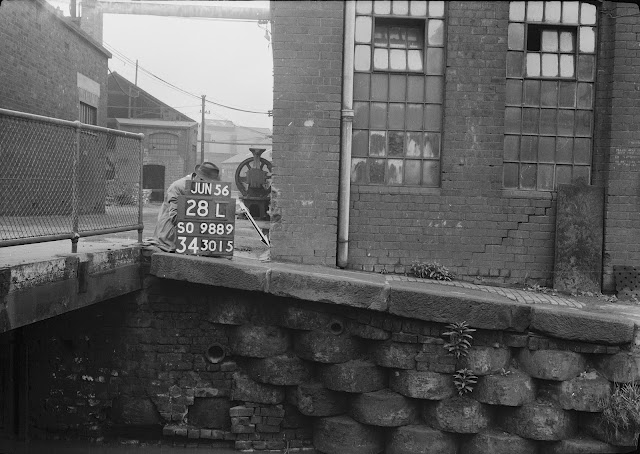
Brades 1956 - Source Sandwell Archive RPS

Postcard of the Brades circa 1930 BCNS Archive

Brades Works Basin - Source Sandwell Archive RPC


Brades Works Basin 1956 - Source Sandwell Archive RPS


Brades Works Basin - R S Gregory

Brades Works Basin - Source Sandwell Archive RPS

The above photos have been assembled from various sources, including those freely found on the internet. My thanks go to the many photographers alive and dead who have contributed to this collection and in so doing, are keeping the memory of these lost canals alive. These images are reproduced for ease of research are are not necessarily the property of this blog, and as such should not be used for commercial gain without the explicit permission of the owner (whoever that may be).