Tuesday 31 March 2009

South Pennine Ring - Barnton to Manchester, Castlefields

South Pennine Ring - Barnton to Manchester, Castlefields
31st March 2009
Trent & Mersey and Bridgewater


30 Miles
1 Lock
10 Hours

The moorings between Barnton and Saltersford tunnels are to die for. The canal forms a small tree lined lagoon with open views to the west over the River Weaver, about 80 feet below. Overnight the weather had turned mild and the heat from the stove became overkill. As a result we spent our first might of the 2009 season with the hatch open and us comfortable and warm below.


The Barnton and Saltersford tunnels and a pair, similar in length and both so twisting that it is difficult to get a line of sight before entering. That said, there was so little traffic that the danger of meeting oncoming boats was slight.

We paused at the Black prince base at Bartington Wharf, where we hired nb Kiwi three years ago, and topped off with diesel at 82p per litre on a 60/40 split. There are few suppliers in the Pennines so we wanted to ensure we had enough to get there and back without fear of running out.

As you pass Anderton the Trent and Mersey takes on a more remote feel, with reed margins stretching to the middle of the channel. The canal runs up a small wooded valley till the contours finally run out and the builders were obliged to make the 1239 yard Preston Brook tunnel. This tunnel operates on a one way system, northbound on the hour and 10 minutes after and southbound on the half hour and 10 minutes after. We arrived at 11.15 so had a brew and waited for the noon slot. By 11.55 am no one had entered the tunnel from the other end (there is a good line of sight) so we set off, emerging 20 mins later at 12.15.


The Bridgewater starts just inside the northern portal of Preston Brook tunnel and immediately the canal becomes deep and wide, encouraging a bit more throttle and higher cruising speeds. We soon reached the facility at Daresbury, described ambiguously as a "laboratory" complete with well tended gardens and a tennis court. I didn't see and two headed rats but I did see a lots of happy smiling employees taking in the air on the canal bank. Scary.

Whilst the Bridgewater may be broad and wide, it is plagued with linear moorings and none more extensive than Lymm Cruising Clubs two sites. One in town and the other out to the north. I was rather taken by the "Commodore's Mooring" alongside the clubhouse - all a bit too "golf clubby" for my taste. With so much time spent crawling past moored boats I was interested to note the local popularity of anti fouling paint in blue and red rather than the normal blacking. There must be a reason for this - maybe the area suffers excessive weed?


Facilities on the Bridgewater are few and far between so wo stopped at one of the very few (and very slow) water points at Little Bollington. At this stage I took a very unsatisfactory call from Tilly, who was being petulant as is her want - but the less said about that the better. Hope dissipates like woodsmoke up a ventilation shaft.

By the time you reach Oldfield Brow the countryside concludes and the onset of sale marks the start of urban waterways with the associated grot and grime. Each successive cruising club becomes more down embattled, clinging on by their fingertips. When boaters resort to covers on their windows you know that the location is an inner city step too far.


Sale is clearly attempting some regeneration along its waterfront, with swanky futuristic flats rubbing shoulder with redundant canal side warehouses. The depressed economy isn't treating these locations well and many appear to be empty. I wouldn't fancy an apartment huddled behind high fences and razorwire.

The western entrance to Manchester is very industrial, and the absence of urban housing means it feels quite safe and secure, past container depots and the Theatre of Dreams - the Manchester United Stadium. Very impressive and some reasonable moorings exist opposite the stadium.


The last mile of so of the route into Castlefield is full of enticing backwaters and arms, mostly boomed off save Pomona Lock - gateway to the Irwell and Salford Docks. We would have liked to explore but time was against us. We moored in Castlefields basin, in the central bay next to the YMCA. There are always folk around here and we have never had any trouble. Tomorrow its the Rochdale nine and the notorious Ashton canal so its alarm clocks set for 5.30 and off for a 6.00 start. Jeff is not enthusiastic!

Captain Ahab meets the style guru

Captain Ahab meets the style guru
31st March 2009

Belle was clearly trying to tell me something when she gave me a 1:1 session with a style guru for Christmas. You would think that my yellow oilskins set of by a matching hat, waders and harpoon would strike the right note in any setting, but apparently not!

Now before you scoff at the vanity of it all, you need to realise that the Captain shed 2.5 stone in the autumn using the Cambridge Diet. So my girth has reduced from a strained 38 to a comfortable 36 and I find myself in need of a whole new wardrobe. Rather than dash out I have waited four months to see if all the mockers and scoffers were right, and that the weight would" pile back on again". Well, I have changed my eating habits and those pounds lost have remained a thing of the past.

If I am to undergo a wholesale change of wardrobe it makes sense to have a plan, strategy or formulae - call it what you will. The cost of the consult isn't insignificant but it is only half the price of a decent suit. Kully (style guru) tested my "colours", investigated my personality and very critically reviewed my favourite casual clothes, before finally delivering her verdict. As you would expect, much of what she told me I already knew - sort of - particularly in terms of uber smart corporate work wear. But her comments about smart casual were a revelation. Within hours Belle returned from a shopping expedition armed with a lavender v neck sweater, which I self consciously wore to a dinner party that evening. Much to my surprise my new look attracted lots of positive comment which has inspired me to further experimentation in colour and cut.

Before we finished I asked for some guidance on narrowboat apparel. What with Wand'ring Bark's new paint job I want to look the part. For once the style guru was at a loss for words, so it appears that my signature sou-wester married to thermals cant be bettered. Whilst she was unable to enhance my watery persona, I was able to recruit a convert to the inland waterways. Watch out for an immaculately turned out style guru and her family on a canal near you!

Monday 30 March 2009

Belle's Blog - Of Yardarms and Terminologies

Captain Ahab’s Word for the Day: ‘Be sure to use the correct boating terminology at all times.’

Now this is where I have a fundamental problem with the whole boating malarkey. My brain appears to be totally of the landlubber variety and nautical terminology whistles in one ear and out of the other. Captain Ahab gets somewhat exasperated when after numerous boating trips and owning a boat for several years, I still refer to sitting at the pointy end. Seems it just isn’t done and I should by now know my bows from my stern, my port from my starboard as well as being au fait with gunwales, tillers and fenders. Perhaps I should read more Hornblower or watch old episodes of Captain Pugwash. Then again, terminology in general is something I’ve never been very good at, sporting terminology in particular. Half time is when you buy an ice cream at the theatre, isn’t it? Tennis players have just two more points to win before they can stop for a drink from the umpire’s call of ‘Juice!’ And that Rugby is played by gentlemen with odd shaped balls is something that I suspect whoever said it was quite accurate about. Given that I have a lifetime of being terminology blind, it’s not so surprising that I have problems wrapping my head around all this boat-speak. However there is one nautical phrase I have taken to like the proverbial duck and that is knowledge of the sun’s whereabouts in relation to the yardarm. Now I do know enough about narrowboats to realise that yardarms are not a feature, but this is a mere technicality. No self-respecting Galley Slave should be without this most useful of phrases. So enthusiastic am I about this, that you’ll frequently find me imbibing some alcoholic beverage or other simply out of respect for tradition. For once I find myself in agreement with Captain Ahab and can see that correct boating terminology most definitely has its uses. And as the sun is over yardarm by anyone’s estimation, I’m taking my G&T and am off to sit at the pointy end while the Captain uses that stick thing to drive the boat from the back.

South Pennine Ring - Nantwich to Barnton

South Pennine Ring - Nantwich to Barnton
30th March 2009
Shropshire Union, Middlewich Branch and Trent & Mersey

25 Miles
8 Locks
9 Hours

We set off past Nantwich, flying over the rooftops of "executive" housing which has been built alongside the embankment. Unusual carved wooden object have been erected every few hundred yards along the towpath, mostly small and difficult to make out from a distance but the final one, opposite Nantwich Marina, is a stunning full sized representation of a shire horse. Truly magnificent.


Just before this statue is the home of Empress Holidays and their fleet of very dated narrowboats. I hope they they are cheap because they look like an aquatic version of Pontins in the jaded, gone to seed1970's! Certain to disappoint.


From Nantwich the bridges broaden out to reflect the widebeam status of the waterway. Even the channel feels wider and deeper, allowing the boat to pick up speed and clip along at a good pace as we pass Hurleston Junction, gateway to the west. Hurleston is guarded by high earthen banks which hold the reservoirs of drinking water for the people of Nantwich and Crewe. From a boaters perspective they look more like a modern take on an iron age hill fort.


Belle decided that this would be a good opportunity to do a spot of running, and after taking instructions to turn left at Barbridge, she jogged off into the distance. We chugged along, past the many moored craft, turning left onto the 9 mile Middlewich Branch Canal, cutting across the grain of the land which a regular series of embankments over steep ravines and then cuttings through sharp ridges. With no sight of Belle for several miles I began to wonder if she was pounding her way towards Chester and came to a stop, wondering at what stage I should worry and think about turning round. Thankfully, just as I came to a stop she emerged round a bend in front of me and huffed and puffed her way back on board - all flushed with exertion.


The branch canal may have only four locks, but they built them deep - three descend eleven feet or more.


nb Hurcules


We encountered feverish activity in the cutting before Bridge 6, with both BW and the Shropshire Union Canal Society hard at work. BW were trimming back the undergrowth and using a wood chipper to fire the trimmings into nb Hercules. Sadly the chipper was angled wrongly and more chips were being blown into the canal than the hold! I suppose it makes unloading easier... Meanwhile the canal society, on a small flotilla of narrowboats were busy building a lovely picnic area complete with tables and chairs on concrete plinths. They were doing a great job, as they have done up and down the whole Shroppie over the years.


Church Minsull sports the brand new "Aqueduct marina, all bare and new, but surprisingly full of boats.


Lunchtime brought us to the hurly burly of Middlewich complete with a gaggle of new hireboats fresh out of Diamond Resorts, Middlewich Narrowboats and Andersen Boats. Andersen are by far the smartest fleet but I have a soft spot for the rugged work weary fleet of Middlewich narrowboats whose every scratch and dent seems to exude happiness of holidays past. Used and abused but much enjoyed.


We moored just before Big Lock, the first broad lock on the northern T&M designed to accommodate Weaver Flats, and went in search of provisions. The Fudge Boat had warned us of the closure of Somerfield so instead we hunted down Liddle who had most of what we needed. As we waited and waited for the Barge Lock to fill (the boaters coming up had forgotten to close a bottom gate paddle) we were joined by the hotel boat Away4aWhile, travelling light from Brimingham to Anderton to pick up new passengers. The two man crew were gaining a day of shore leave by making the passage in four 12 hour days. We shared the lock, BCN anecdotes and mugs of tea before striking out for Anderton, 9 miles distant. They made fast progress with their newly rebuilt engine, zipping past the various flashes with us trailing in their wake.


The Chemical plant at Rudheath hisses and spits its caustic brew much as it has done for a hundred years, which was more than could be said for the rather sad remains of the old Lion Saltworks which seems nearer and nearer collapse each time we pass. The ancient buildings are steadily decaying back into the briney landscape they plundered for so long.


Lion Saltworks


The rather smart ground of Northwich Victoria lies next to the canal, its prosperity probably more a testament to it also being the home ground of Manchester United Reserves than the skill of the team which bears the name of the nearby town. We parted company with Away4aWhile at the ABC base, recovering the tea mug and promising to meet up again in Birmingham.


We pushed on through the Barnton Tunnel in the gathering gloom, mooring up in the delightful lagoon which separates it from its northerly twin, the Saltersford Tunnel.


Sunday 29 March 2009

South Pennine Ring - Goldstone to Nantwich

South Pennine Ring - Goldstone Wharf to Nantwich
29th March 2009
Shropshire Union


15 Miles
27 Locks
8 Hours

The weather took a glorious turn for the better. After yesterday's icy wind from the north today it was wall to wall sunshine, blazing out of an azure blue sky - the perfect spring day.

Tyrley Locks

And how better to start the day than a trip down my favourite three miles of the Shroppie including Woodseaves and Tyrley locks / cutting? The image of Woodseaves southbound was seared into my memory as a seven year old and the picture of a deep straight cutting with a high bridge creeping closer (but never reached) was a mental image I used during my adolescent years when sleep evaded me. I now fall asleep at the drop of a hat but my love of the cutting remains undimmed.

We has a lazy start, at about 10.00am by my watch but 9.00am in yesterdays "real" time. Patches of frost lingered in the shady depths, nipping my nose and numbing my fingers. However, this cold was short lived and Tyrely Locks sparkled in the morning sun, glinting off some miniature daffodils which surrounded the sign. They nodded their tiny heads in the morning breeze, acknowledging our progress down the hill.


Our progress down the Audlem flight was thwarted by the novice crew on "Invincible", a Challenger shared ownership boat who were tentatively finding their feet.
Audlem Flight
We paused outside the Shroppie Fly to refill with water and as I filled up, Belle popped inside the pub and emerged with two pints of very acceptable Flowers in plastic "takeway" glasses kept on board for precisely this purpose. The spring sun had brought out the bikers en mass and the outdoor seating area was packed. Our arrival proved to be an interesting addition to proceedings and we spent 15 minutes fielding "any questions" on all things canal.


The Shroppie Fly PH

Just above Audlem Bottom Lock we passed nb Debdale. Sadly the current crew of this shared ownership craft were not the editors of the Debdale Blog but awarded me 10:10 for observation.

As we exited the second Hack Green Lock we caught our first sight of our destination - the Pennines, three days cruising away in the north east.
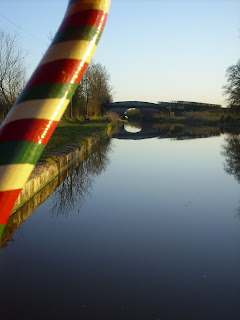
We moored just short of Nantwich at the wide section between bridges 90 and 91, well away from both roads and rail. Time for a spot of fishing in the evening sun. I caught a tiddler and Jeff lost a good specimen - he therefore claimed a moral victory but as we all know, the ones which get away don't count!


A peaceful mooring under a starry sky. A perfect end to a perfect second day.

Painting Narrowboats - Signwriting

Painting Narrowboats
Confessions of a DIY'er - Signwriting
29th March 2009

Part six of seven

I had planned to have a go at the signwriting myself, and even bought a copy of A J Lewry's Signwritten Art. But the more I read the more I realised that the standard I was looking for was beyond my abilities. As Clint Eastwood once said, "a man's got to know his limitations".

Don't tell Belle, but I do have some limitations. Not many, but they include:


  • Plastering walls to a perfectly smooth finish

  • Bricklaying to a standard good enough for house walls

  • Brain Surgery - but Mortimer Bones may be able to help out here

  • And yes, Sign writing!

I am sure I could do it given time and practice, but alas I have neither. So rather than spoil the job right at the end I decided that prudence was the better part of valour, and recruited some professional help. The safest way of finding a good signwriter is from personal recommendation and an inspection of their past work. I had heard that Jim McCormack was good and liked what he had done on Robber Button, so I gave him a call. I have since discovered that his work graces the sides of none other than the infamous Granny Buttons - so he cant be bad.

Jim is a proper commercial signwriter and canal boats is a preferred sideline. He is particularly interesting in that he integrates technology with the traditional art, using a Computer Genarated mask to achieve the body of the letters quickly, and then applying the artistic shading. I liked the sound of this and sent him the exact measurements plus an outline of what I was looking for.

I had spent several months trying to work out exactly what I wanted , eventually resorting to taking photos of boats with appealing letter work. With the benefit of about 20 photos I defined exactly what I wanted, which I would describe as basically "block letters with a slight serif" (flicky out bits on the corners) divided by bold industrial lines and circles. This is in no way a "best" design, merely one which works for me. Anything goes in this area, so the world is your typographical oyster.


I worked up a detailed plan, allowing for the differences in panel sizes on each side, and demonstrated how I wanted the Wand'ring to arch over the Bark. I also sent him a photo of the boat plus one of another boat which was similar to what I had in mind. A couple of days later he responded with a computer generated image of the boat in its new livery. His interpretation was exactly what I wanted and nothing needed changing. Jim takes the view that he is there to deliver what the customer wants, and isn't at all precious about using a preferred style or anything - very businesslike.

The CGI was then converted into full sized stencils, complete with cut out lettering. This was carefully fixed to the cabin sides and and the basic lettering picked out in special one shot signwriters paint. He went to some trouble to match the main colour with the ceam I had used on the coach lines.
He then cut out the 3d shading with a sharp knife and applied the contrasting paint before removing the mask. This removal was rather like a magicians trick. One moment it at all looked a mess and then, in an instant, the lettering was revealed in all its glory. Jim finished the project off by applying the graduated shading freehand and, as a final touch, inserted his trademark "Jim" tag so discretely that you have to hunt really hard to find it. The whole job on both sides took a mere 5 hours including an hour of downtime as we sheltered from a heavy shower.

Real signwriting is something of a dying art, which happily lives on among the boating community. Even here there is a move towards self adhesive PVC letters which are functional and reasonably priced, but don't quite hit the spot for me. So, how much did all this cost? Well I am not going to tell you! It was more than I wanted to pay but in the end it was worth every penny. I enjoy looking at the back panels every time I see Wand'ring Bark rise up out of a lock - and you cant' put a price on that sort of thing.

Saturday 28 March 2009

Magnolia Countdown

Magnolia Countdown
28th March 2009

An extended Easter trip has become something of a habit for the Captain and his crew. It's a glorious time of year with those first hardy daffodils giving way to the snowy white of the Blackthorn, and then that sheen of green which adorns the hedgerows heralding the first deciduous leaves of the year.

Its a time of renewal, freshness, a year reborn. How better to celebrate than with an Easter boat trip?

My personal countdown to Easter is measured by the progression of the Magnolia tree in our front garden. I bought this plant as a frost bitten sapling which was so near death the nursery refused to accept anything more than 50p for it over 15 years ago. This particular tree has has defied the odds having had that near death experience at the outset. Initially it has to overcome the transplant following purchase, then my brother in law drove over in in his MR2, breaking one half off, and then I had to move it again to allow for a drive expansion project. Now Magnolias detest disruption ,so all credit to this specimen which has survived and thrived in spite of its maltreatment.


Even before its leaves are seared away by the first frost of Autumn, its buds are plump and ready to wait out the long winter months. Throughout March the flowers tentatively poke their noses out of their thermal overcoats, sniffing the air, ready to burst out in all their glory the moment they thing that the risk of frost has passed.

They always get it wrong of course, tempted out way too soon into their majestic display a bit like the first mini skirt of spring. I guess that Darwin would say that its the early bird that catches the admiring glances!

Well, my Magnolia is flashing her assets for all who care to glance in her direction, so that means that Easter is upon us once again and we are off. This time it's a trans Penning treck taking in both the Huddersfield Narrow and the Rochdale. The planning has been beset with uncertainty, what with the delayed decisions about Standedge Tunnel, the washed out Weir at Cooper Bridge and most recently the oil spill on the lower Peak Forest. These issues have been resolved and the appropriate bookings made with BW for the three critical stages:

Standedge, West to East - Friday 3rd April
Rochdale Summit - Wednesday 8th April
Rochdale descent into Manchester - Thursday 9th April

So, if you see Wand'ring Bark making a solitary passage to and fro over the Pennines this Easter, give us a wave.

Happy Easter.

South Pennine Ring - Calf Heath to Goldstone Wharf

South Pennine Ring - Calf Heath to Goldstone Wharf
28th March 2009

29 Miles
2 Locks
9 Hours

Its a good job that "flexible" is one of my middle names. Until about 10 days ago we were all set to reach the Huddersfiled Narrow Canal via the Macclesfield and Peak Forest Canals. This route would have been both the fastest and the most attractive, but sadly a major oil spill on the lower Peak Forest put paid to that plan.

The problem was that Boelle needed to return to the Midlands to meet up with Tilly on the Wednesday and train tickets from Whaley Bridge had already been bought. Some quick recalculations using Canalplanac told me that by doing 9.5 hour days and assuming a fairly fast passage speed (3.75 mph) we could go to Manchester instead, drop Belle of at Picadilly Basin, and still keep our booking at Standedge Tunnel on the Friday. It looked like a plan so we turned left instead of right out of the marina. Whats more, the Cooper Bridge weir repair was completed ahead of schedule so a circular route became possible once more, returning to Manchester via the Rochdale canal.

To ensure a good start we slept on Wand'ring Bark on the Friday night and were off at 7.45am, reaching Autherley Junction at 9.30am, just at Napton Narrowboats were starting up for the day. They completed a much needed pumpout, the first since last summer. The breather hole project has kept the tank smell free for eight months.

The day was forecast as "wintry showers" and so it turned out. We pressed on against strengthening northerly winds which brought with it 3 or 4 short sharp downpours, initially rain but later hail. BW had been hard at work on the Shropshire Union, tree clearing on the offside bank and giving Gnosall Cutting a short back and sides, doubling the width of the navigation channel.


Gnosall Cutting
Just beyond Gnosall we came across a BW workboat containing a large pile of logs. We availed ourselves of a few thinner ones which were sawn up for future fuel to supplement the five bags of coal stowed in the foredeck. With very little traffic on the canal we soon reached Norbury and eyeballed Starcross, complete in her matching colours (Ferrari Red and Union Green).

nb Starcross
We pushed on through Grub Street Cutting, thankful for the shelter it provided. Our plan was to try and get a couple of miles ahead of Canalplan's target destination of Park Heath Bridge (48) and finally reached Goldstone Wharf at 5.30pm, settling in for a Pizza and three episodes of 24 (series one) which would become an enduring feature of the two week trip.


Goldstone Wharf
The clocks change tonight so its early to bed beneath a glorious golden sunset, reflecting the name of the mooring.

Friday 27 March 2009

Painting Narrowboats - Coach lines

Painting Narrowboats
Confessions of a DIY'er - Coach lines
27th March 2009

Part five of seven

The difference between a classy looking finish and something that is just "OK is surprisingly fine. In the same way that accessories can turn an ordinary looking outfit into something special, so some quality detailing can lift a paint job out of the mundane.

I am not one for masses of frills and scrolls, tending more towards the understated and classic. Mind you, that probably says more about me and my personality than what represents good taste! I therefore set about about the detailing looking for something simple yet traditional, impressive but not fussy. Most importantly, I wanted the finishing touches to be achievable to a reasonable standard for an amateur painter.

We had decided on a three colour approach, Ferrari Red for the main body, Union Green for the side panels and Cream for the coach lines.

I started with the cabin side coach lines, which would be 2cm wide and bordered by 5cm of red, which looked about right. I could have opted for some PVC stick on lines, but I wanted all the colours to match plus, I wanted to paint it all myself. The key was getting the lines straight and even more importantly - parallel. The eye will forgive a slightly wavy parallel but and widening or narrowing would be painfully obvious.

So, armed with several rolls of 2cm low tack masking tape I set about defining the lines. As with paint preparation, expect this phase to take much longer than the application. In this case about four times as long, but the investment in time will really pay off. After a few abortive attempts I managed to get the first strips parallel with the cabin roof and gunnels, joining them with various straight and curved uprights.

To achieve perfectly parallel lines I stuck a second line of masking tape inside the last, covering the area to be painted. This gave me a line to follow for my inside strips of masking tape. All that then remained was to remove the middle strip and voila! a perfectly parallel 2cm line ready for painting.

The Rapidpaint product's high opacity means that it covers well, even cream over bright red and green. I might have got away with one coat, but there was no point in half measures at this stage. I left the first coat to dry for a couple of hours and then applied a second, removing the masking tape as soon as it was touch dry. I found a few bleeds under the masking tape (top tip: buy better quality masking tape) but these were easily remedied with the application of some more red and green with a very fine artists brush. Watercolour painters avert your gaze - I used my best camel hair rigger brushes!

With the coach lines done I turned my attention to the two hatch covers, one for the water tank in the bows and the other over the rear cabin entrance. I could have gone for a fancy design complete with a heart, spade or other geometric device. However, I stuck to the less is more approach and simply applied a narrow 1cm coach line in cream. The effect was fantastic - a tiny detail which took 30 mins to apply brought the whole project to life.

As for the sign writing? I will tell more in a couple of days time.

Thursday 26 March 2009

i-pods, boats and bling

i-pods, boats and bling
24th March 2009

As you can imagine, I'm not a bling sort of bloke. And yet, if you had been tailing me recently there is evidence to suggest otherwise.

You would have found me deeply engrossed in the bling section of Halfords. Don't worry, I havn't bought a Renault Clio (the boy racers car of choice), tinted the windows, lowered the suspension, added alloy wheels and a big fat exhaust. Neither for that matter have I been tempted by a Vibe Technologies Super Sub Woofer which fills the boot, or worst of all, fitted those stupid blue lights underneath the car!

No. in fact I was paying homage to the new love of my life - a 120 gigabite i-pod classic. Until recently I viewed i-pods as an affectation beloved of adolescents and poseurs, but I am a convert. When I worked in the Venture Capital Industry the rule of thumb was that for an innovation to be really successful it has to be five times better than its predecessor. How this multiple was measured was open to debate, but the i-pod certainly fits the criteria.

If I could take one item back into my past to show and impress my teenage self it would be the seemingly humble i-pod. A machine no larger than a calculator that can store my entire extensive music collection, and then twice as much again! Absolutely mind blowing and such a far cry from my treasured box of 15 favourite cassette tapes. They were even called compact as I recall!

Having succumbed to Apple's techno wonder, I find myself wanting to use it wherever I go. The car was a problem initially because being old (4 years!) the stereo doesn't have an i-pod plug. This was overcome by one of those radio widgets which transmit a signal that can be picked up by the radio, and powered by the cigarette lighter. But what of the boat? I can't go away for two weeks without a way to access my favourite tunes - or even worse - a power source to re-charge the object of my infatuation.

Aint she cute!

This brings me back to my visit to Halfords. I figured that if my radio thingey can work in the car, then why not on the boat radio / CD? The problem was a lack of power, or rather the fact that I built a 12v power supply in the wrong place and only included one. These boy racers know a thing or two about power supplies for all their bolt on accessories, so if you can't beat them why not join them?

I am now the proud owner of a 12 volt power supply splitter which plugs into the inaccessible socket and delivers three sources of yummy 12v, all backlit by a lurid pulsating blue light. Very hip, very trendy, very boat boy bling!

Whatever next? Perhaps a spoiler on the back, furry dice in the front and some spinners down the sides? Who knows!

Wednesday 25 March 2009

Narrowboats spotted on Liverpool's Waterfront

Narrowboats Spotted on Liverpool's Waterfront
25th March 2009

I spotted this picture of two narrowboats braving some squally weather on Liverpool's waterfront on the BBC's website today. They were part of the opening flotilla, with the section becoming available to the wider boating community in April.


I have to admit that they don't look too comfortable. Apart from the Three Graces in the background, the walled section looks rather like the Maud Foster in Boston (Lincs)!

Painting Narrowboats - Application

Painting Narrowboats
Confessions of a DIY'er - Application
25th March 2009

Part four of seven

After all the effort and anguish of the preparation, its great to finally get the brushes out and start to apply some paint. You finally feel that you are making progress and your vision starts to emerge before your eyes.

Different paints come with different instructions, or on the case of Rapidpaint, no instructions at all! You see, Rapidpaint exist to supply the trade market and you are expected to have a good idea of what you are doing. That said, they are extremely knowledgeable and only too happy to share their insights on the application of their products. Just ask.

I was blinded with technical info regarding the quality of resins used (very good and wear resistant) and the proportion of pigment (very high - 70%?) which means that scratches can be polished out. They also showed me all the mixing machines and the non slip polymers and generally won my heart as well as my wallet.

Quality paint isn't cheap so don't expect any change out of £20 for a 1 litre tin, but if you are doing the job there is no point scrimping on the paint itself. Go for quality every time.

We were told to build up two coats of undercoat first and then apply two coats of top coat, lightly sanding each coat before applying the next to ensure a smooth finish and to get good adhesion. As the undercoat is made to the same specifications as the top coat this would mean that we end up with four layers of very durable paint, which should keep the rust at bay for many years to come.

The paint was rather thick, and as it was applied on hot sunny days, it tended to cure very fast. In fact became touch dry in about 15 minutes, so it paid to do small sections at a time and to keep progressing along before an edge formed. Working on Rapidpaint's recommendation, the paint was applied using a small foam roller and covering about a square metre at a time. As soon and the paint had been applied I used a high quality long bristled 2" brush to "lay it off". Basically this involved drawing the brush over the wet surface very, very lightly in both directions, smoothing off any little bubbles or unevenness. You finish with the lightest touch possible, just like drawing a feather over the surface, which leaves it completely smooth just before it dries and becomes unworkable.

Don't try to save money by using a cheap brush. It's a false economy and a good brush will improve the finish immensely. But having invested in a good brush make sure you rinse it out thoroughly in white spirit / turps and then wash it in warm soapy water before drying it with the bristles all smoothed together. I wouldn't say that a good brush will last a lifetime, but with care it will serve you well for many years.

Give the paint time to dry between coats, and taking good care not to apply it just before it rains or you are inundated with flies. If you look closely, Wand'ring Bark carries the scars of both!

A good quality paint, such at the product we used, is quite forgiving and not prone to running. The chances of a run on the cabin sides is much reduced if you use a roller to apply the paint and leave the brush for feathering off. What is more, a nice thick paint with good opacity covers well and the thickness of the resin settles into and fills any small blemishes you may have missed in the filling / preparation phase.

The golden rules:
  1. Use good quality paint. (Craftmaster is great stuff too).
  2. Apply it with a roller and feather off in both directions before it dries.
  3. Do small bits at a time but move on before the edges dry.
  4. Use the most expensive long bristled brush you can find.
  5. Give the paint time to dry between coats.
  6. Always, always, always apply two top coats.
With care you can achieve a very satisfactory finish using a roller and brush at a fraction of the price you have to pay for a professional repaint. What is more, you will have the satisfaction of knowing you have done it yourself.

Monday 23 March 2009

Belle's Blog - Puzzling on the Picturesque

Captain Ahab’s Word for the Day: ‘The Caldon canal is reputedly the most picturesque in England.’

And very pretty it is too. The lack of rain helps, as does the occasional glimmer of sunshine. But what puzzles me most is that every trip we undertake reputedly takes in the most picturesque canal in England. At Easter, the Llangollen canal held this title. Last year it was the Peak Forest. Another time it belonged to the Kennet & Avon. This year it was the reason we were heading to Stratford. Before long I anticipate the whole of the BCN will have this honour bestowed upon them. But then again, maybe not. Regeneration has come along way since Captain Ahab’s days as a Cabin Boy when dead dogs were found floating in Gas Street Basin but picturesque may be stretching things too far even for him. Perhaps it’s a title that should be awarded annually, a bit like Britain in Bloom? Interesting concept. But possibly misses the point. I suspect that this award belongs firmly in the head of Captain Ahab and is his attempt at luring me back for yet another week as galley slave and ornamental figurehead aboard the Wand’ring Bark. Well I’m onto him. There’s no fooling me. Besides as temptations go, it’s fundamentally flawed. It rests on the assumption that I can differentiate between different stretches of canal. This I can do only up to a point. I notice when we’re going through stretches of dismal urban deprivation and decay. I notice when there are trees and bits of green stuff. That I notice the difference is largely because in the dismal places we get rocks hurled at us. And that makes me look up from my books. If it’s really bad I even lose my place. As for the other bits, to be honest, they all look much the same. That’s not to say I don’t appreciate them. I do. They’re lovely. If the sun is shining they mean I can read outside, all day, and sit at the pointy end in true figurehead fashion. See? I know my place.

Sunday 22 March 2009

British Waterways - generating interest

British Waterways – generating interest

22nd March 2009

Following on from my earlier blog about BW’s plans to build 25 small scale hydro electric plants, a bit more detail has emerged about their power play to become a force in electricial generation.


Sorry about the truly terrible puns, but the subject matter is such fertile ground.


We are told that the first five plants will be built on existing weirs on the Severn and the Trent in the Midlands, plus three more on the Ouse, Aire and Don in Yorkshire. These are all substantial natural watercourses with significant volumes of moving water. The plans are well advanced and are currently being progressed through the Planning Permission process. As with most good ideas, I predict a lot of noise from the NIMBY brigade!


Clearly these major rivers hold potential for many generation stations, so I guess that these are pilots to see how they perform throughout the seasons. BW also point out that they own about 90 feeder streams which deliver running water to the canals and that many of these have electrical generation potential. Or is that Kinetic… I think Kinetic is the latent power within an already moving object whereas potential is merely something that has, well you know, the potential to be turned into energy…. Or maybe it’s the other way round.


These schemes are going to cost £120m of which £20m has already been pledged by Climate Change Capital. However, they will have to get their skates on if they are to hit their objective of 40 megawatts flowing into the National Grid by 2010.


I am all for schemes like this, which increase our sustainable energy production and opens up a new source of income for cash strapped British waterways. So, if you are travelling these rivers over the next year or so keep you eyes peeled.


It sounds as if BW are entering a powerplay from which there can be no losers.

Saturday 21 March 2009

Painting Narrowboats - Preparation

Painting Narrowboats
Confessions of a DIY'er - Preparation
21st March 2009

Part three of seven


If you fail to prepare be prepared to fail.

I know it's a trite little saying, which is usually used about the need to plan, but it is very applicable to painting narrowboats.

Its hard to emphasise just how important preparation is - or how great the temptation is to skimp on this vital stage, especially when your arms ache from hours of hard sanding. However, it's a false economy to short change the preparation stage, and a few extra hours at this end of the project will add years to the life of your finished paint job.

Be very thorough to sand everything down, probably using wet and dry paper to achieve a good key, smoothing off all the blobs, chips, stray lumps of weld and sundry imperfections. A smooth clean surface at this stage will give you a fighting chance of a good glossy finish at the end, but any imperfections left on will be magnified by the topcoat.

I started my preparations on Wand'ring Bark with good intentions. I wasn't going to skimp of the preparation and I was going to work at it till the surface was perfect. My problem is that I am somewhat lacking in patience and always willing to accept a compromise. You may not agree, but I think that being a perfectionist is more a curse than a blessing!.

The need for preparation on Wand'ring Bark went deep. When built, the shell was fabricated proficiently, but no effort was made to hide the welds. As a result the joins in the sheet steel were very visible with "blobby" welds running down the cabin sides, rising above the surface in some places and dipping into little craters in others. I resolved to rectify this deficiency so I attacked the welds with my trusty 110mm angle grinder and, 1.5 hours and 12 discs later, all the raised bits had been neatly abraded away. This process was followed up with the application of a layer of automotive body filler, which concealed any residual depressions, all smoothed off with some fine wet and dry paper.

I am particularly proud of the end result as a mixture of diligent application and judicious positioning of the side panels, has resulted in a weld free cabin.

However, I did make a bit of a mistake on the roof. The roof was covered in a thick cream non slip finish and as I ground away the top welds, I created a shallow saucer like indentation, more in the non slip surface than in the underlying steel itself. The presence of the thick anti slip coat meant that body filler would stand out badly, so I had to rely on the flattening capacity of the paints which would be applied. More of that in a later blog. I would have made my life easier if I had used a larger angle grinder as the tendency to create a rounded depression would have been lessened.

With my angle grinder to hand I also decided to remove a rather strange and pointless bit of steel scroll work which adorned the end of the hatch cover. It looked a bit like a Flemish Gable and had no link with any other part of the boat. The end result is a much more discrete 5mm raised lip which is just enough to close the hatch. I suspect that I destroyed the manufacturers "signature" but hey ho - its my boat.


So there you have Wand'ring Bark, my pride and joy, sitting at her moorings with all her paintwork scratched to a dull matt finish, interspersed with strips of grey filler concealing the welds. I figured that if you are doing a job you may as well do it properly, so I took the wet and dry to the sign writing, removing all traced of "Piccolo" in about 60 minutes flat. At this stage she looked in a right sate!


It was here that I took a bit of a shortcut that I later came to regret. Whilst I had done a thorough job preparing the cabin sides and roof, plus the strip round the gunnels, I didn't go as far as removing the mushroom vents or the window frames. The books say you should, but it seems like a lot of hassle for items which were very firmly fixed in place and holding the water out vary adequately. It seemed like a case of "if it ain't bust don't fix it"!

Two years down the line and I see the errors of my ways. The mushrooms and windows are screwed in to a bed of silicone and a bit of silicone inevitably oozes out as they are fitted. Paint does not adhere well to silicone and within twelve months, the new paint was lifting up at the edges. I have subsequently removed the vents and painted under them, as I should have done at the outset, and the same process will probably be needed for the windows. You live and learn!

The take away thought has to be that you can't spend too much time on preparation. Allocate at least twice as much time to preparation as you do to applying paint and you probably won't go far wrong.

Thursday 19 March 2009

Painting Narrowboats - Planning

Painting Narrowboats
Confessions of a DIY'er - Planning
19th March 2009

Part two of seven

Now you have decided on your preferred approach to the task (professional or DIY) its time to select a colour scheme. There are no rights and wrongs when it comes to colour, its all a matter of personal choice.

Once you have chosen your colour scheme the boat becomes very much "yours" and will inevitably say something about you. It's a bit like personalising your new home when you decorate rooms. Until it is repainted you can blame it on the last owners, but you never feel that you truly possess the house till you have stamped an indelible mark on it. Its the same with your boat, but because its a big step its worth taking your time.

I would suggest that you make a point of looking at other boats, comparing the colours they have used, how they work together and the sort of finish that has been achieved. It is very hard to remember exactly what you see, so I would recommend that you carry a small digital camera with you, snapping off some photos when a boat catches your eye. Then, in the peace of your own home, you can work out exactly what you like about the boat and gradually build up a plan of what you want.


Whilst you can use any colour you like, I would offe
r a word of caution. You may need to sell your boat in the future and in the same way that you probably wouldn't buy a wacky Laurence Llwellyn Bowyn "romantic" style house, prospective purchasers may well be put off by very individualistic styles. I would suggest that vivid geometric designs or zebra stripes have limited appeal - but I might be wrong. A nod towards the traditional seems easier to sell.

But its not just the colour - layout also plays a big part. You are not working with a blank canvas, as all boats are different and offer varying opportu
nities / limitations. Take a good look look at the layout of your hull and work out what balance would look good. Probably the best way to achieve this is to measure the boat very accurately and then to draw it out on graph paper. Don't use one page because it wont give enough detail, so stick two or even three sheets together and map it all out, including windows, vents, fenders and other "furniture". Don't worry if the curved bits are not exactly right - its the overall sense of balance you are looking for - not a work of art. Next, mark out the proposed panels, lines, wording and decals and colour them in with crayons, finally standing back to see how it all works together. Better still, set it aside and sleep on it, returning to it with fresh eyes in the morning. Is this how you want your pride and joy to look?

Oh, a thought. Its quite likely that the positions of the windows are not identical on both sides of the boat. They may look alike, but when you measure then there not! This variation can make a big difference if you are planning to apply sign wr
iting to any panels you create.

An investment in planning before you lift the phone
, buy the paint of break open the first pack of sandpaper will really pay dividends.


So what of Wand'ring Bark? Well, having looked and looked we (actually Belle) decided on a bold and lively red with green cabin sides approach. This is a pretty traditional configuration which looks vibrant and eye catching, hopefully adding something to the overall canal landscape. Having looked closely at the layout it was apparent that the traditional stern cabin approach would be difficult to achieve, but a slight variation using a small "engine room" panel between the two rear windows created a good overall balance.

But which red and which green? We tried the International paint range on the cratch and gangplank as a sort of tester zone and found them to be far to acidic and bright for out taste, so we looked up Rapidpaint of Digbeth (Birmingham) and sought expert advice. They mix all their paints in house and mainly serve the automotive refinishing market, so they know a thing or two about colour matching. They can mix over 2000 colours, but they also sell a range of stock narrow boat paint, which is particularly high in pigmentation and resin quality. This, we were told, will resist fade, abrasion and because the pigment is so dense, most scratches would polish out.

Our final selection was Ferrari Red for the main colour with Union Green for the side panels and detailing in Cream. Because the colours are made as a suite they all work in the same tonal range, which is techno speak for "they go together well". They also supply non slip paint made from the exact same resins and pigment, but with 30% being polymer granules which absorb the pigment and the paint therefore never scraches off. We took a litre of the red non slip for the front and rear cockpit floors, plus the walkways down the gunnels. We also later went back and bought some loose granules so we could paint the engine and gas locker hatches in a contrasting non slip green.

So we had a plan and we had the paint. All we needed was the weather to get the job done... but it was the summer of 2007. More of that another time.

Tuesday 17 March 2009

Painting Narrowboats

Painting Narrowboats
Confessions of a DIY'er
17th March 2009

Part one of seven

If you have arrived at this page looking for tips on watercolour painting, and how to achieve the perfect canal reflection using mixtures of Burnt Umber, Raw Sienna and Vermilion you will be sadly disappointed.

Whilst I do like to dabble in watercolour painting, and the inland waterways offer a ready supply of inspiration, I am talking about actually painting narrowboats. You know - sandpaper, two inch brushes and oil based topcoats - that sort of thing.

So, if you are thinking about repainting your boat the big decision isn't "what colours do I want?". The real question is "do I tackle this myself or leave it to the experts?". If you are pondering this weighty issue I would suggest you consider the following issues:

  • Money. A professional job is likely to set you back up to £5,000 whereas a DIY repaint will cost maybe 10% of that. That is a big saving in these days of fiscal constraint
  • Time. Time is money and painting a narrowboat takes a lot of time - that's why it costs so much. If you do it yourself, out in the open air all the preparation, priming, undercoating, topcoating and finishing off takes an age. This especially true when you have to dodge the showers and wait for coats to dry in between driving to and from the boat. By contrast, leaving it to the professionals is a simple, pleasant cruise to their base and then a return journey a month or so later as the proud owner of the shiniest boat on the cut
  • Quality. Its said that in life you only get what you pay for and you can expect a top notch job from an experienced boatyard. However, you do have to ask yourself what you are really looking for. A flawless two pack automotive standard sheen is hard to achieve yourself but on the other hand, a DIY job may well be good enough, and cause you a lot less stress when the first overhanging branch gouges a dirty great scratch down your newly painted cabin side.

So the answer to the DIY / professional dilemma lies somewhere within the above. I live my real life in a project management environment where the commission is always a variation on the theme of "I want it better, faster and cheaper" - all at the same time. Now I am experienced enough to know that this conflicting triangle of demands is impossible to satisfy, and the same is true in the field of boat painting:
  • I can achieve cheapness at the expense of time, and possibly quality
  • I can achieve quality at the expense of cost
  • I can achieve speed at the expense of cost
You need to decide on your priorities and personal skills, and then make your decision accordingly. But before you decide that a DIY repaint is all just too much hassle remember, that shiny new paint job will fade and scratch and in a few short seasons the boat will have reverted to its rather dull and tarnished former self (but hopefully without any rust).

Wand'ring Bark - before (as Piccolo)


When we bought Wand'ring Bark she was only three and a half years old, but by then her paint job had already faded and started to go chalky. Actually, she wasn't even called Wand'ring Bark. Originally she was named Piccolo, an abstract sort of name that the previous owners thought would be inoffensive to and subsequent owners. The generally poor initial paint job applied by Eastern Caravans and Narrowboats, or maybe the fabricators, Floating Homes, meant that a repaint was needed urgently.

Wand'ring Bark is cruised quite heavily and my interest in the exploration of the less travelled extremities of the system means that she has quite a hard life. Her paintwork can therefore take a hammering, so it is just as well that I subscribe to the school of thought that says that paint is first and foremost to protect against rust. You paint a boat so that you can have fun knocking it all off again!

With this mindset in place I decided a DIY paint job would be be ideal, providing the end result looks smart and professional. As well as being so much cheaper, it has the added advantage of being touch up-able (is that a real word?) when the inevitable scrapes happen.

And after
Was this the right decision? Well, it's now two years since I started the repaint and I guess that the proof of the pudding is in the eating. This is the first boat I have fully repainted and predictably, I got some things right and in other areas I got things rather wrong.

It's good to learn lessons from your mistakes, but it is even better to learn from the mistakes of others. I will explain all in a series of seven blogs on Painting Narrowboats:
  1. Pro or DIY? (this post)
  2. Planning
  3. Preparation
  4. Application
  5. Coach lines
  6. Signwriting
  7. Decals and other fancy bits

Monday 16 March 2009

Belle's Blog - Bonnie & Clyde

Captain Ahab’s Word for the Day: ‘Nowhere is far by canal; it just takes a long time to get there.’

A very long time to be precise. It’s taken us two days of what can only be described as gentle cruising to make it as far as the Staffordshire town of Stone. Even by narrowboat standards that’s slow. By car the journey would take approximately forty minutes. But I am told that speed is not the point of canal cruising. Indeed, there are people whose life ambition it seems, is to make narrowboaters slow down even further. Captain Ahab is known as a courteous and conscientious helmsman. He nearly always sticks to the Waterways’ Code, the first requirement of which must surely be to slow down when passing moored boats. So he receives it with some disgruntlement when the turtles pop their heads out and accuse him of speeding. Turtles are those boaters moored in the most inappropriate spots – the outside of a narrow bend, directly on exit from a lock, etc. They are always just inside when another boat passes, and their heads on the end of their long scrawny necks, pop straight up through a hatch crying ‘Slow down!’ in a threatening manner. Captain Ahab is generally very polite to them but he has recently expressed an interest in investing in a super soaker water spray gun. My technique would be to rev up the engine, slam on the throttle and go so fast they could only hurl abuse at my wake. Maybe we should double up with the Captain as gunner? We could be the Bonnie and Clyde of the Inland Waterways. However, as no one has committed a bank job using a narrowboat as a get away vehicle, there is every possibility that this plan would come to naught.

Sunday 15 March 2009

Birmingham Canals "then and now" - Black Country Museum

BCN Images "then and now"
Black Country Museum


When I reviewed Ray Shill's The Birmingham Canal Navigations I mentioned the idea of posting some "then and now" photos from around the BCN, highlighting the changes that have taken place over the years.

One particular image that caught my eye was a photo of the Tipton portal at the eastern end of the Dudley Canal Tunnel, taken from the Birmingham Road bridge. The photo shows the Black Country Museum in its infancy in the late 1970's and the early restoration work completed by the Dudley Canal Trust.


Here is the same scene thirty years later:


For the eagle eyed, Wand'ring Bark is third boat back on the left, tied to the ring in the bridge wall which makes a useful emergency mooring when everything else is occupied.

Saturday 14 March 2009

North Walsham and Dilham Canal - the lower reaches

North Walsham and Dilham Canal
The lower reaches - Ebridge to Dilham
14th March 2009

This post is the fourth and last in the North Walsham and Dilham Canal series, covering arguably the most interesting section spanning about five files of water, three locks and a very real possibility of full restoration to a navigable standard.


Before we move downstream from Ebridge I thought you might like a final backward glance at a wherry tied up alongside Ebridge Mill.


There are no bridges between Ebridge and the next lock at Briggate. The lock runs out of the Briggate millpond with the the remains of the mill festering in the undergrowth. This was a splendid example of a Norfolk watermill but unfortunately it was burned down in an arson attack during the 1974.


The Lock chamber is well preserved and even sports a couple of complete (but very rotten) bottom gates with their balance beams in place. They look almost "boat ready" but don't be deceived, even 35 years ago a small gang of us vainly tried to close them!


The East Anglian Waterways Association have been active again and the site is all spick and span with the lock and its surrounds more visible than it has been since my schooldays. The area is all fenced off for safety so sorry guys, I admit that my enthusiasm caused me to dive over the bridge wall to take a closer look. It was a shame that the ground on the other side was 2ft lower because I had a heck of a struggle to get back over!


Canal crossings are few and far between in these parts and the next structure is Honing bridge alongside the recently dredged Honing Staithe. With the Yarmouth and North Norfolk Railway running behind the staithe (closed in 1953 and now part of the Weavers Way footpath) I suspect that this was another transhipment basin.


The Canal Bridge is in good condition but the iron road bridge over the railway bed is well worth a look as well.


The final lock on the canal is Honing or Dilham Lock. No one seems to be quite sure which hamlet "owns" it as it is equidistant between the two of them. Finding it is a bit of a puzzle as well and the only clue is to identify a dead end track usefully called "Lock Lane" and then, just as you become convinced that you are going to end up in farmyard, or stuck in axle deep mud, there is a path leading off to the right into the woods. Follow this path for a couple of hundred yards and the splashing of water will become audible and then, voila, the lock complete with an EA monitoring station. The lock is in pretty good condition, built to the standard NW&DC dimensions of 50' x 12' 4" and 3' draft.


The lock comes complete with a bottom gate which is just visible under the water.

Beyond Honing / Dilham Lock the canal enters the open expanses of the Broads, continuing for a mile or so and passing a short side arm to East Ruston and under Tonnage Bridge which was rebuilt in the 1980's after it collapsed under the weight of farm machinery.


The canal finally joins the Ant above Wayford Bridge on the Wroxham to St
alham road. Whilst it isn't strictly part of the NW&D canal, a short canalised arm of the Ant extends to a staithe in Dilham, complete with a close replica of a NW&DC bridge.


So there you have it. The North Walsham and Dilham Canal in four chunks. A unique construction in Norfolk and one which is rapidly being brought back to life by the North Walsham and Dilham Canal Trust. But before you get too excited and start making plans to have your narrowboat craned to the Broads, remember that the max length is 50 feet (that's OK because Wand'ring Bark is a mere 42' 6") and also the course of canal restorations rarely run smoothly. I seem to recall a certain Mr Hutchings paying the canal a visit in the 1960's and observing that it would be a relatively easy restoration job. Here we are, 40 years later and the task remains.

But hey, I am an optimist. Given the lack of obstructions on the line all the way up to Swafield, an enthusiastic owner and a dedicated team of restoration volunteers I think I might just see it finished before the bottom of Wand'ring Bark rusts through.